Instructions for assembling:
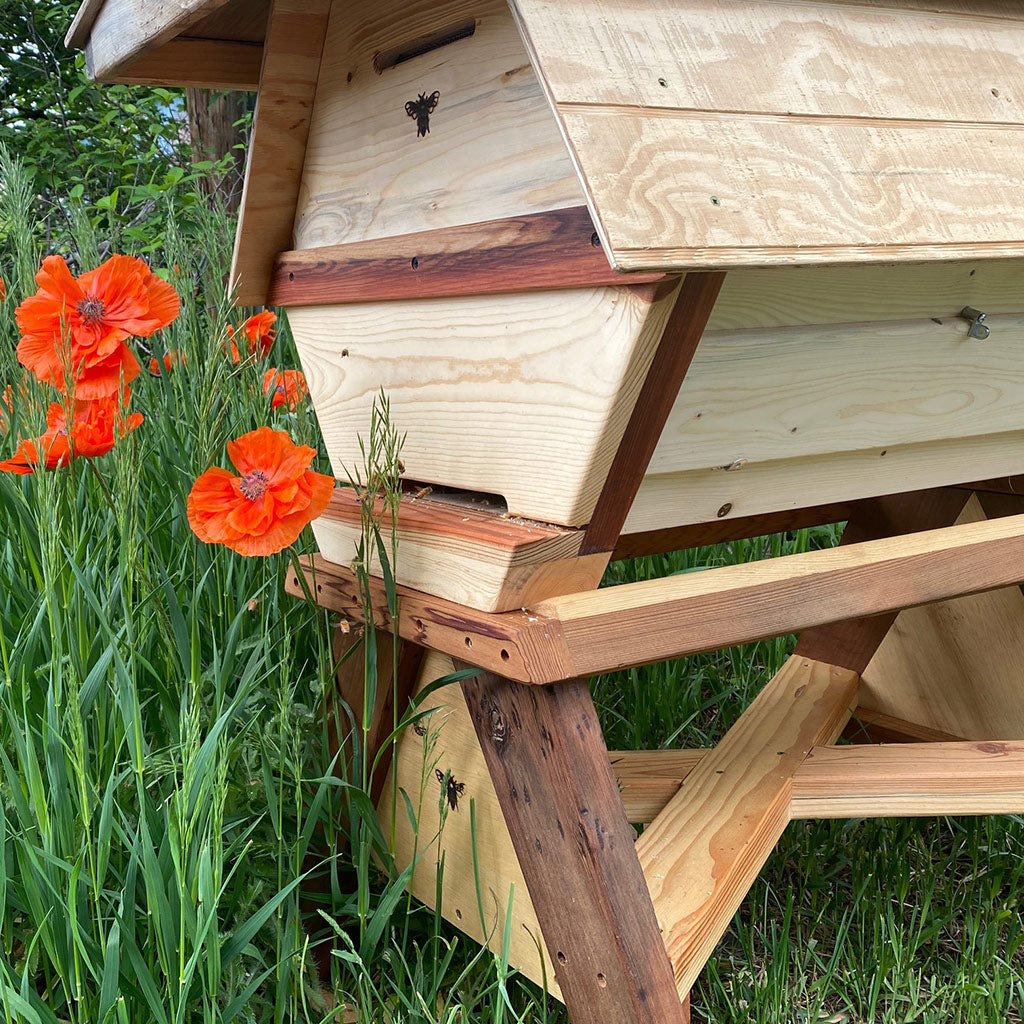
The Cathedral Northern Lights Hive® Un-assembled Kit


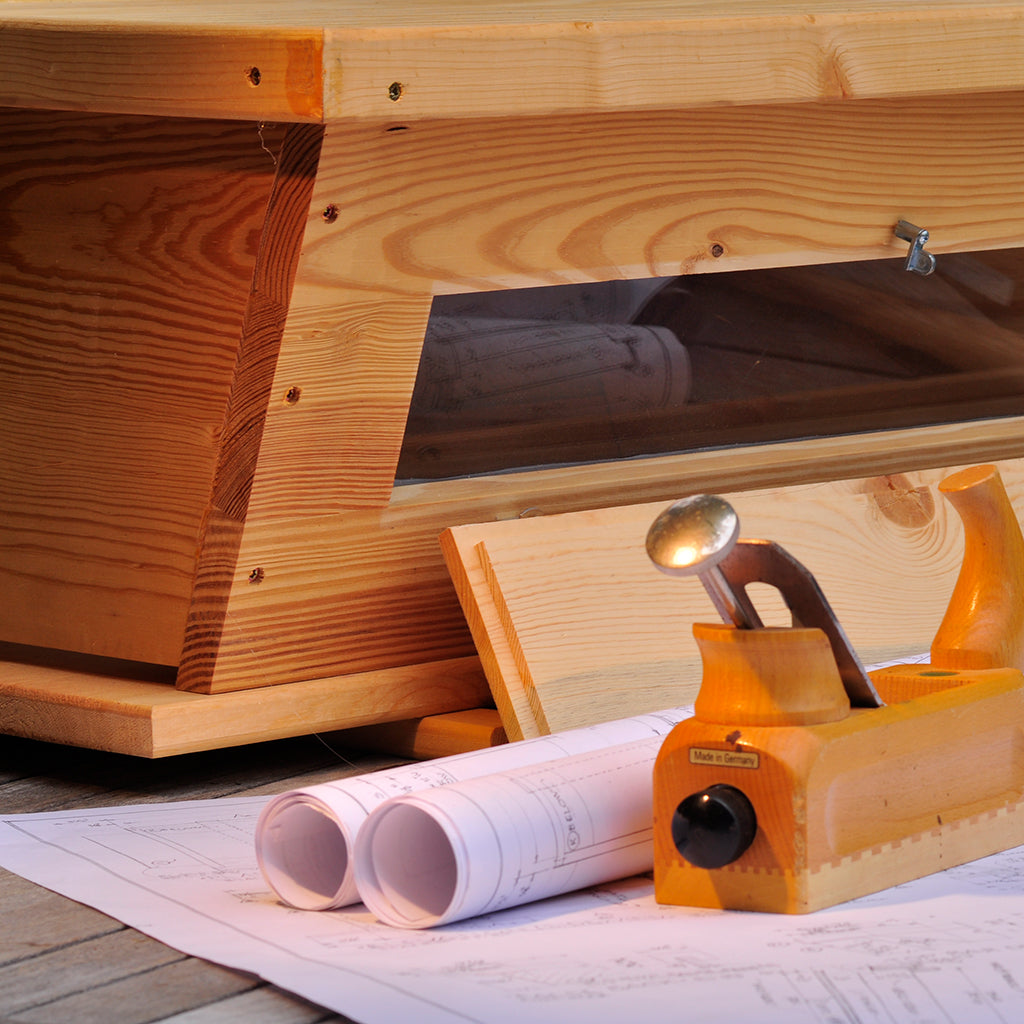
The Kit comes with detailed schematic plans for putting the hive together.
First we need to make the jig to assemble the Side Panels (D),(E),(F). This insures we get a perfect hexagon shape
The Gluing Board Jig

Parts and tools needed to assemble the jig for the
Cathedral Northern Lights Hive®
The only thing to make is the The Gluing Board Jig.It is not part of The Cathedral Hive® Un-assembled Kit
Purpose:To hold the 3 Side Panels boards comprising each of the hive halves at an exact angle while the glue dries

Note: Making the jig for the original Cathedral Hive® kit is the same process shown here but with slightly different measurements. So if you have made a jig previously for the original Cathedral Hive® it has to be modified.
Materials:
The most important part is a "really square" 3/4 inch piece of plywood.
* Flat board: 3/4" plywood, particle or melamine board
Size: 18-1/4” wide x 30” long x ¾’ thick
NOTE: The 18-1/4” width needs to be exact to achieve the correct angle for the sides when held in place while glue dries.
NOTE: If you have built the original Cathedral Hive® Kit, the jig is 18-1/2" wide you will need to add 1/8" spacer to each side of the jig to accommodate for making the Northern Lights® Kit
* 2 Side Rails Size: 2x4 x 27” length (screw to the sides of jig board)
* 2 underneath support boards Size: 2x4 x 27” length
* 2 Middle Supports Size: 2x4 x 7-1/8" Tall (length)
* 4 Ratchet Straps
NOTE: non-ratcheting rafting straps won’t provide enough pull
* Wood Glue – Tight Bond III, Ultimate – Best waterproof and dries slowly
Making the Gluing Board Jig
First, make notch cutouts on the 2x4 Side Rails.
If this is not easy for you to accomplish, no worries, you could skip the notches and glue on the Braces after the Side Panel glue has set up.

Building the Jig. The 'Rails' or side pieces of the jig. Notches cut out to accommodate for the Northern Lights Hive Center and End Braces so the braces can be drilled on after the sides are glued together. The notches are 1 1/2" wide, the width of the braces, and flush with the plywood.

Building the Jig. Example of Side Panels sitting in jig: The notched cut outs on the end of the jig rails are for the Braces to sit down flush with the upside down Side Panels and Hive Front and Back. Notice the line drawn to enable the two Side Panels to be quickly aligned.

Building the Jig. A line is drawn down 3/4" from the edge of the rail to help later align the Hive Ends nicely. We are testing our clamping procedure before gluing the rails on.

Building the Jig. Making the jig. Pilot screw holes and put in the screws part way. This way you don’t have to realign. Also you can draw a pencil line on the inside of the rails where the plywood is positioned, this will help get the rails back into the correct position after the glue is applied.

Building the Jig. Glue edges

Building the Jig. Spread the glue with paint brush. Apply a coating of glue also to the rails. You have 9 min with Ultimate III glue.

Building the Jig. Rails are glued and clamped and then screwed.

Building the Jig. Detail underneath of how the gluing jig is put together. A 2x4 is screwed into 3/4 inch plywood underneath for extra support.

Building the Jig. Another detail of how the gluing jig is put together

Building the Jig. Add the 2 middle supports, 2x4s, 7-1/8" length/tall
Place the middle supports in the middle of the jig to support the Side Panels
The jig is done now let's glue the Side Panels in the jig.
Side Panels Upper Section (E), (E) and (F)- Assembling and Gluing
There are 2 Methods for Gluing the Side Panels
Method one:
scroll down and review Method two, we are getting great results with this new method two.

Get the three Side Panels (E) (F) into position. Put the middle side on top of the middle jig supports while positioning the other 2 sides leaning into the top board.

Positioning the top piece and aligning all three (3) Side Panels (
E)

Notice the notch in the jig will allow space for the braces to be fitted while the Side Panels (E)are still in the gluing jig.

Getting the ends flush for a pre-gluing test. Check that the ends of all three Side Panels (E) are flush. They can be sanded down later if they are a little off.

Now go for a dry run and time the assembly. Practice getting the clamping straps in place within 9 min, before the glue dries. Keep practicing until you can get below the time frame.

All straps are in place being sure that no strap will be blocking the notched out area on the rail where the braces will be located.

Here is a closeup of where the jig rail is notched for the Braces (K) and (L).

You may have to use some force to get the Side Panels (E) to conform
It takes some forcing to get the edges to align. Have a helper align the edges while you tighten the clamps. Tighten all the clamps a little at a time

Using force. It might be necessary to over correct the alignment and let the tightening of the straps force the joints to comply!
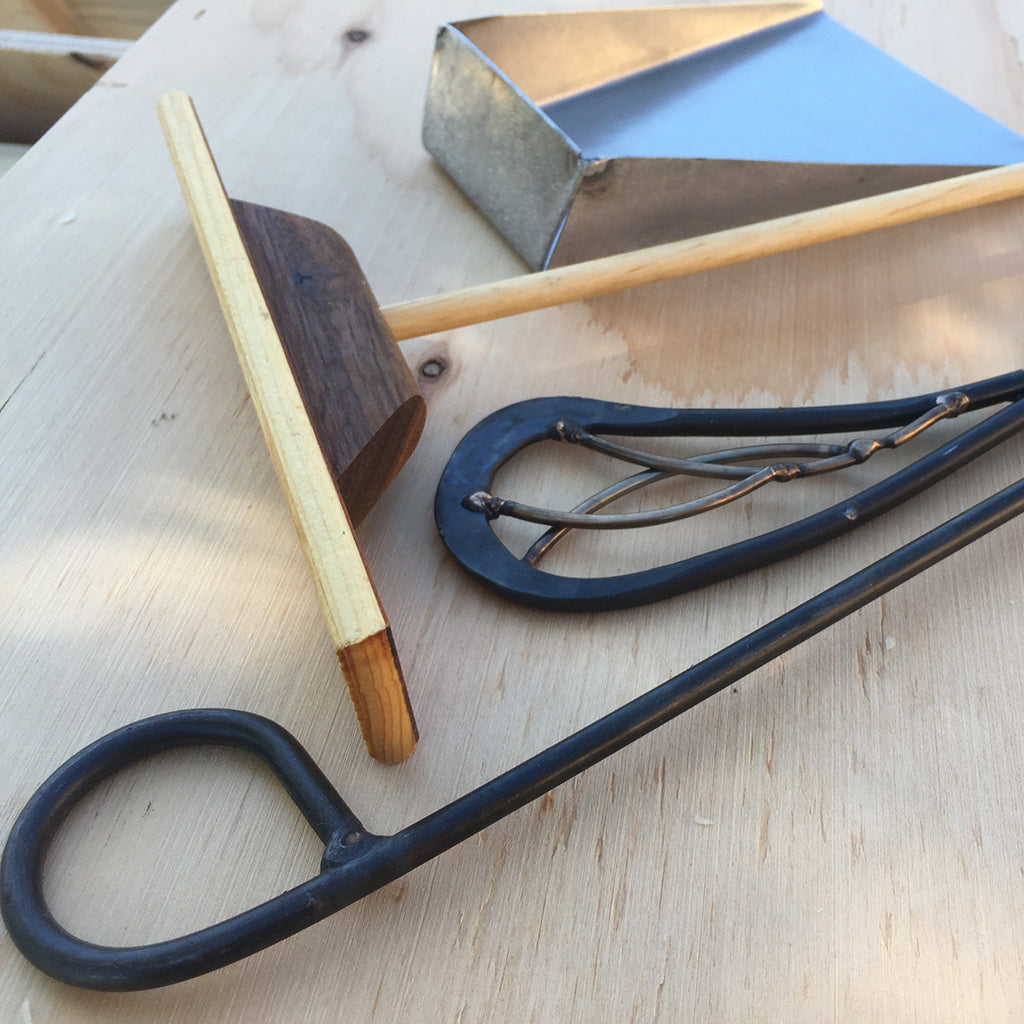
We use a container to put the glue into so we can quickly get glue on a brush. Painters tape is used to put on just under the straps to keep the glue off them.
OK, set your timer!
Ready!
Set !

Go !

Apply glue to “both” edges of the Side Panels (E) to be glued

Put the straps on and tighten them just barely snug. You want to have enough play to align the Side Panel edges and ends
Side Panels (E) - After aligned add tension to the straps, glue should squeeze out from the joints. Be sure to clean up the glue oozing from inside joints of the hive !
Wiping off the excess glue
Side Panels (E) - Now let them dry in the jig see recommendation time of your glue (4-24 hours)
After the glue is dry remove the straps

Side Panels (E) - Plane the ends of the so they are flush to put on the Hive End (G) panels. Move the Side Panels forward in the jig and plane off the unequal ends
Method Two:
Side PanelsAssembling and Gluing
Using Gorilla tape to hold Side Panels together while applying glue.
Note: Pictured for this technique are the Side Panels of the Lower Section - Both Lower and Upper sections can be done with this alternative method

Use clear Duct tape (Gorilla Duct Tape is the "only" choice)
Side Panels Lower Section (B), (D), (F)
Lay the three Side Panels on a flat surface, choose which side of the boards will be the 'outside' of your hive and face those up. Line up the edges of the Side Panels as best you can and make the ends flush.
Use 6" strips of tape horizontally to hold the ends together. Don't worry too much if the Side Panels are curved, the jig will force any warp together. Now put a long strip of tape along the entire seam.

Then pick up the three Side Panels all together like a trifold door and flip them over to apply the glue

Gluing the Side Panels

You can easily pickup the 3 Side Panels at one time to place into the Jig

Side Panels - closeup placed into the jig

Strap down the Side Panels in the jig
Screwing on the Hive Ends
Upper Section (G)

Find the nicest, smoothest side of the Hive End (G) board for the outside of your hive.

Then on the back side find your center line and mark your center line on the Hive End panel. (G)
The Cutting Pattern Template from the Schematic

Cut the template on the dotted line where it says 'cut line'. It is helpful to cut a notch on the center line of the template so you can see accurately the center line on your Hive End (G).

You can also cut a notch on the top of the template pattern to help align the pattern on the Hive End
Align the long edge of the template to the long edge of the Hive End (G).

Center the lines and tape pattern template on the Hive End (G)

On the inside side of the Hive End (G), drill a pilot hole in each of the indicated drilling spots on the pattern

Now flip the Hive End (G) to the side that is the outside of the hive and counter sink

Use your Braces (K) and (L) to align your Hive End (G) so it is centered.

Then securely hold while you trace around the Hive End (G) to mark where you will glue and screw the Hive End. The pencil line will allow you to easily align the Hive End once you put on the glue

Apply a ribbon of glue over the screw holes and place it on the Side Panels.
Wipe off excess glue

Hive End (G) - Clamp in place using your pencil line to align accurately

The Hive Ends (G) clamped in place. Screw on using 1 1/2" screws
Now repeat these exact steps for the other Hive End (G)
Gluing and Screwing the Braces

Make your center Brace (L) equal distance to side Braces (L)

We made blocks of wood for spacers so that when we glue the Braces they will not slide around on the slippery glue.

Trim your Braces if necessary to have a flush fit with the Sides and End of the Hive

Apply glue to the assembled Hive Body and the Braces (K) and (L)

Put glue on 2 sides of the Braces (K) and (L), the side that goes against the assembled Hive Body and the side that goes against the Hive End (G) panel.

Braces can be stapled and later screwed all the way through the Roof Side Panels (W)
**** Mark with a pencil on the front of the Hive where you drill the screw into the Braces (K) and (L) , so that you do not drill into the screws when attaching the Side Roof Panel (W) into the Braces
Pilot and drill holes, using 2' screws, three (3) per side.

Then use a 2 1/2" screw for attaching Side Brace (L) to the end of the Center Brace (K)

Move to the back of the hive and do the other end, glue and screw end Braces (K) and (L)

Glue middle Braces (K) and (L)

Screw middle Braces (K) and (L)
OPTION to put Braces on before Ends:

OPTION:
Braces can also be put in place, glued, and strapped before the ends are screwed on.

Now is the time to round over edges with a sander, (beautifying ) before we attach the Side Roof Panels (W).
Sanding vent slots on Hive Ends (G)

Sand down Hive Ends (G) so they are flush with Braces (K) and (L)

Sand vent slot smooth on Hive Ends (G) with a sander or use a 1/4" Router bit

Sanded (round over) Vent Slots on Hive Ends (G)
Attaching the Side Roof Panels (W)

On the Roof Side Panels (W) measure and mark 2" in on the underside panel.

The Roof Side Panels (W) should extend a 1/2" above the Hive Ends and braces. We made a 1/2 inch piece of board to help with aligning the Roof Side Panels (W) when attaching to the Upper Section Hive Body.
Clamp the Roof Side Panels (W) to the Upper Section of the hive to hold in place, then use a rubber mallet to tap the Side Panels to the 1/2" extension of the Side Panels over the Upper Section

Measuring 1/2"

Align the front of the Side Roof Panels (W) extending 2" past the Hive Ends for an overhang at the front of the hive
Practice the fit of Side Roof Panels (W) before gluing

Put glue on the Side Roof Panels (W) and Braces (K) and (L) .

Screw on Side Roof Panels (W) into Braces (K) and (L).
Drilling the Vent holes in Upper Section panel (F)
These holes in the Upper Section Top Board (F) are critical to the ventilation that is needed for proper air flow with the Cathedral Hive®. If you do not make these holes it is very likely your hive will over heat. The bees in a Top Bar Hive move the air differently than in a Warre or Langstroth Hive

Measure on the Upper Section where the Vent Holes will be drilled
Measure 1-1/2" from back of the Brace and 1-5/8" from the Side of the Hive
Drill four 1-1/4" holes - This is imperative for proper ventilation of the hive


Staple the screen over the Vent Holes you just drilled and the Vent Slots on the End panels

Use the 6" x 8" screen provided and screen over these Vent holes and the Hive End Vent Slot from underside. Fold the screen in half and position at 90 degrees and staple

Stapling on Screen
Assembling the Ventilated Roof

Now we are ready to assemble the Ventilated Roof but first you may need to sand or plane down the Side Roof Panels (W) a tad, depending on how tight you want the fit.

Plane or sand down the outside edge of the Roof Side Panels (W) just enough so the Roof Ends (Q)fit nicely

Planing down the Side Roof Panels (W)

Find the middle of the Upper Section of the hive to place the Roof End (Q) trusses
Roof End (Q) trusses - Center them end of hive to opposite end of hive

Setting the Roof End (Q) trusses on the Upper Section, getting ready to screw on the Cedar Planks (R)

Another view of the Roof End (Q) trusses withe the middle truss (QQ)

Aligning Roof End (Q) trusses

Center and mark the middle Roof Truss (QQ), measure 2" for the truss to overhang from the Roof Side Panel (W)

Centering the Roof Ends and middle Truss

Clamping the Roof Ends (trusses) in place to align the Cedar Planks
Lower Section of the Cathedral Northern Lights Hive -
Assembling and Gluing
These steps are similar to the Gluing and Assembling the Upper Section above but you will have an Entrance Hive End (J), a Window Side (B) and the Landing Boards to attach (T) (TT)
Now we are ready to put together the Side Panels Lower Section (D) (B)

First decide which side you want the window (B) on, you will have to think upside down.
Now that you know where your Entrance Hive End (J) goes,
where your Landing Boards (T) and (TT) goes determines where your window (B) is.

Set the Window Panel (B) and other Side Panel (D) in the jig, then the Hive Board Bottom (F).

Testing the fit of the Bottom Section Side Panels (B), (D) and (F) with straps

Strap the Side Panels (B) (D) (F) for the Bottom Section in place
It is good to have a partner for gluing up the Side Panels (B) (D) (F)

Make sure hive sides are flush with the 27” mark on your jig.

Gluing up the Side Panels (B) (D) (F)

Align the edges of the Side Panels (B) (D) (F) as close as possible
Wipe off excess glue.
Testing the position and alignment of the Braces (K) and (L) on the
Bottom Section

Entrance Brace LL

The Landing Board Bottom piece T and the Entrance Braces LL

Another look at the Entrance Braces and the Landing Board Bottom piece

Use a 2" screw to screw in the Landing Board to the Entrance Braces

The Lower Section, the back of the hive Braces L and K

Notice how the Landing Board Brace is positioned flush with the Entrance Braces against the hive sides and the Landing Board is protruding out to give the bees a place to land.
Also observe how the Landing Board Brace is clamped in place.

Make sure you wipe off the glue on the underside of this brace, because we’ll be adding another final redwood Top Landing Board (TT) on top of this Landing Board Brace (T).

The Landing Board Extension - Top piece (TT)

View of the Front of the hive- Lower Section. We went one by one with the braces. First gluing, then poisoning and then clamping

Another view, on the left of the image is the Landing Board (T) and Entrance Braces (LL) clamped.

Back of the hive- Lower Section, Braces (K) and (L) clamped

Back of the hive- Lower Section pilot screw holes in Braces (K) and (L)
Back of the hive- Lower Section - Braces (K) and (L) screwed on

Front of the Hive - Lower Section - Piloting long 2” angle screw to attach Landing Board Extension (T)

Screwing on Landing Board Extension (T)

1 hour later ! We free the hive from the clamps!
Hive Ends, Lower Section
The Hive Ends for the Lower Section are exactly the same as the Hive Ends for the Upper Section, using the same paper pattern to drill holes for the screws

The Hive End - Entrance (J)

Hive Back Lower Section (H) pilot holes ready to put in alignment screws and glue

Use the lighter gray, 6 3/4" pattern for the Hive Front Lower Section (J)

Back Hive End (H) -Find the center of the board, measuring the middle

Back Hive End pilot holes ready to put in alignment screws and glue

Back Hive End gluing the end

Glue both surfaces

Clamp Hive End board in place and screw. Wipe excess glue from Landing Board Brace

Landing Board Top - reclaimed redwood, (actually reclaimed from my grandma's back porch) should fit snug and may have to be sanded a bit to fit.
This is the poisoning for the deluxe
Landing Board Top
Put glue on all surfaces that will touch.
Screw in from bottom With 2 “ screws, three screws should do it.
Installing Ledges (M) - Lower Section

Measure 1/4" down inside Hive Body Lower Section for Ledge placement

Clamp Ledge into place and mark with pencil placement
Take out

Gluing Braces, Upper Section
Great! You got all three boards together for the Upper Section and strapped together securely in a record 8 min 57 sec!
Now we get the braces on. Clamps are your friend here because those glued up braces want to slip around.

We have set out everything we need. Notice I said “we” it is really handy to have a helper for the gluing and clamping. Tight Bond III Ultimate is amazing and using this brand gives you a full 9 min until the glue starts to set up.

Check that braces (L) and (K) are are fitting nicely. Sand if necessary

Here we are still practicing our set up. Clamping a 2x4 along the middle of the braces will help to keep them in place while you are getting screws in them.
(photo?)
First take one brace, put it into position and mark along its side with a pen. This will make it easier to clamp the glued brace right in the correct place.
Coat both the Braces and Hive Body with glue and the ends of the Center Braces
Gluing Center Braces (K) - Put glue on the Brace and the Hive
Gluing Center Braces (K) - Put glue on the Brace and the Hive
We find it is good to strap the Center Braces (K) to hold them in plans when gluing
Final clamping setup. Here all the braces are positioned and clamped
A station break!

Now you can relax! You only have to do this sprint one more time.
Screwing on the Braces,
Lower Section
We then pilot holes and put in the screws. Notice we planned ahead and made sure we didn’t put clamps over our key screwing locations. Use a long 2 1/2 inch screw for screwing side braces into the ends of the center braces.

Now counter sink the screw holes on the Hive End on a flat work space.
Cutting the Hive End pattern for pre-drilling holes

Place pattern on Hive End to line up for drilling. Find the center of your 22 “ Hive End panel, 11” right!
Align drilling pattern with Hive End and secure with painters tape.

Keep drill perpendicular to hive!

Set Hive End in position making sure the 22” Hive End is aligned perfectly with Braces.

Partly screw in guide screws into Hive Body so when you glue, you will be able to feel that all is aligned well.

If you don’t clamp your paper pattern, you can easily remove the pattern to screw.

Clamp Hive End in place while piloting holes.

Use a hand planer or sand the ends of the sides and braces flat so that the Front and Back Hive Ends will sit flat

You can put glue on the hive body first then...

Glue up the Hive End.

Screw into place! 9 min! A piece of cake!

Now glue the other end.

You may need to use clamps to bend or flatten the wood to the hive before screwing. This will make the Hive End fit very snug.
Congratulations! There you have it! A fully assembled Norther Lights Cathedral Hive!